2023-06-03 21:43:09
Bash对于绝大多数任务来说够用。所以没必要太折腾,先试试Bash吧。
第一部分我会记录一些Linux自带(绝大多数情况)程序的用法,第二部分会把它们组合起来使用。
head命令用于显示文件的开头几行,sort命令用于对文件或标准输入进行排序,可以按照字母顺序、数字大小、日期等方式进行排序,uniq命令则用于去除重复的行,可以通过参数指定只保留重复行的数量或只显示重复行。
head命令的语法:head [选项] [文件]。例如,要查看文件file.txt的前10行,请使用以下命令:head -n 10 file.txt。¹
sort命令的语法:sort [选项] [文件]。例如,要按字母顺序对文件file.txt进行排序,请使用以下命令:sort file.txt。要按数字大小对文件进行排序,请使用以下命令:sort -n file.txt。
uniq命令的语法:uniq [选项] [输入文件] [输出文件]。例如,要从文件file.txt中删除重复的行并将结果写入新文件newfile.txt,请使用以下命令:uniq file.txt newfile.txt。要显示重复行及其出现次数,请使用以下命令:uniq -c file.txt。
tee:用于分叉管道流的工具。管道符|就像一节节不透明的水管一样将输入流运送到输出流中,而tee就是这么一个工具,它就像一个Y型管道一样,可以将前一级的输入分叉到另一个路径上,并让输入的数据流原封不动地送往管道流的下一级。
bash的一行语句结尾可以写分号;,也可以不写。用分号可以将多条指令串联起来运行,比如cmd1; cmd2; cmd3; ...
它的管道是一个相当好用的东西,可以将几个命令的输入输出相互串起来,得到一个组合后的工具,并且管道是系统级工具,因此十分灵活且高效。比如cmd1 | cmd2 | xargs cmd3 | ...。
这里的xargs是另一个工具,它可以将它得到的stdin转化成后面跟随指令的参数列表。比如find . -type f -name "* *" -print0 | xargs -0 rm -f,它就可以将符合条件的文件作为一个参数列表传递给rm -f指令。另外,这里的-0是告诉xargs,在读入stdin时,使用
null 作为分隔符。
除了管道和分号,还有&&,也可以连接多条指令。它和分号类似,不过区别是它会检查前一条指令的运行结果(返回值),并且根据这个来决定是否运行下一条指令。例如,cmd1 && cmd2 && cmd3,这样写的话,只要任意一个指令运行失败,那么它之后的所有指令都会不执行,这样可以有效防止发生一些难以预料的情况。
除了语法,Bash还有很多很实用的快捷键作为功能扩展。我到今天都保持默认shell为Bash很大程度就是因为我发现这些功能相当完善,可以解决大部分的日常需求。什么,你还有需求?那为啥不先试试写个脚本搞定?脚本太麻烦/不想造轮子再试试其他工具嘛。以前用过zsh,fish之类的带有很强大的completion的shell,用久了发现启动性能/语法兼容性的问题大于我对功能的需求,遂弃之。
ctrl-x, ctrl-e:将当前输入映射到编辑器里,关闭编辑器后自动执行。这功能不用我解释,评价是特别好用。ctrl-a/e:跳转到行首/行尾,ctrl-w删除一个词。ctrl-r:搜索指令,输入关键词,在histoty里边查找对应命令。一定程度上算completion的补全吧,也很好用。References: grep命令 – 强大的文本搜索工具
Global search Regular Expression and Print out the lines。常用工具,虽然现在有不少替代品,不过作为基础设施之一,学了到处都能用是它最大的好处。
它的语法很简单,grep [参数] [正则表达式] <文件名>,也可以缺省文件名让它从输入管道中读取数据流。
| 参数 | 功能 |
|---|---|
| -b | 显示匹配行距文件头部的偏移量 |
| -o | 显示匹配词距文件头部的偏移量 |
| -c | 只显示匹配的行数 |
| -q | 静默执行模式 |
| -E | 支持扩展正则表达式 |
| -r | 递归搜索模式 |
| -F | 匹配固定字符串的内容 |
| -s | 不显示没有匹配文本的错误信息 |
| -h | 搜索多文件时不显示文件名 |
| -v | 显示不包含匹配文本的所有行 |
| -i | 忽略关键词大小写 |
| -w | 精准匹配整词 |
| -l | 只显示符合匹配条件的文件名 |
| -x | 精准匹配整行 |
| -n | 显示所有匹配行及其行号 |
更多详细的用法可以参考man。
参数众多的下载工具,从建立镜像站到带cookie下载都能完成。
/robots.txt rules.| Parameter | Function |
|---|---|
-r |
Recursive download (download entire directories) |
-O <filename> |
Save downloaded file with a specific name |
-nc |
Skip download if file already exists |
-np |
Don’t ascend to parent directories |
-P <directory> |
Save files to a specific directory |
-q |
Quiet mode (suppress output) |
-c (or --continue) |
Resume a partially downloaded file. |
-i <file> |
Read URLs from a file and download them. |
-k (or
--convert-links) |
Convert links in downloaded files to point at local files. |
-t <number> |
Set the number of retries for failed downloads. |
-U <agent-string> |
Set the User-Agent header for HTTP requests. |
-e <command> |
Execute a command after downloading. |
-x |
Force directories to be created even if they don’t exist. |
-l <depth> |
Specify the maximum recursion depth. |
-A <accept-list> |
Accept only files with specific extensions. |
-R <reject-list> |
Reject files with specific extensions. |
--limit-rate=<rate> |
Limit download speed (e.g., --limit-rate=1M). |
一个用来处理pdf的工具箱。目前我的用法主要是连接多个pdf:
pdftk 1.pdf 2.pdf cat output sum.pdf下面是pdftk的帮助手册,可以参照:
SYNOPSIS
       pdftk <input PDF files | - | PROMPT>
            [ input_pw <input PDF owner passwords | PROMPT> ]
            [ <operation> <operation arguments> ]
            [ output <output filename | - | PROMPT> ]
            [ encrypt_40bit | encrypt_128bit | encrypt_aes128 ]
            [ allow <permissions> ]
            [ owner_pw <owner password | PROMPT> ]
            [ user_pw <user password | PROMPT> ]
            [ flatten ] [ need_appearances ]
            [ compress | uncompress ]
            [ keep_first_id | keep_final_id ] [ drop_xfa ] [ drop_xmp ]
            [ replacement_font <font name> ]
            [ verbose ] [ dont_ask | do_ask ]
       Where:
            <operation> may be empty, or:
            [ cat | shuffle | burst | rotate |
              generate_fdf | fill_form |
              background | multibackground |
              stamp | multistamp |
              dump_data | dump_data_utf8 |
              dump_data_fields | dump_data_fields_utf8 |
              dump_data_annots |
              update_info | update_info_utf8 |
attach_files | unpack_files ]最近用这东西在命令行里做ppt转pdf,特别方便:
libreoffice --headless --invisible --convert-to pdf *.ppt强大够用的终端复用工具,或者说是tui多窗口管理工具twm(不是
<c-b> <c-c>:在tmux中创建新的session<c-b> c:在tmux中创建新的window今天用的时候忘名字了)记录一下
一个终端下的tui文件管理器,部分支持Vim键位。
也是忘了名字了,一个代码行数统计工具。
能替代curl的,用来发送http请求的一个小工具。比如可以这么用:
http --json POST http://example.com/api/resource <<EOF
{
  "name": "John Doe",
  "age": 30
}
EOF
来向后端发送一个请求。
或者用curl也挺好的:
curl -X POST                // 指定请求方法
     -H "application/json"  // 指定请求头
     -H "Authorization: xxxxxx"
-d '{"key": "value"}' // 请求体数据curl支持-C断点续传:
curl -C - -O <url>wget支持-c来断点续传:
wget -c <url>二进制文件名称是gh,是github官方推出的命令行版github客户端。
sudo pacman -S github-cli黑魔法开始了(不是
c-x, c-e
在编辑器中编辑命令并在编辑器退出后执行命令,配合export EDITOR=vimc-a/e 行首/行尾c-w 以空格为分隔删除单词./a.out | head -n 100000 | sort | uniq -c这样就能得到统计好的输出数据。
看到同学发的抽奖现场用Python现写程序,节目效果拉满()不过,都用Linux了,还不用Bash?
fname="lab6.c"; rand=$((RANDOM%$(cat "$fname" | wc -l))); sed -n "$rand"p "$fname"上面的命令其实是3行命令,但是每行都比较短就合成一行了。第一个和第二个都是赋值命令,设置文件名,并根据文件行数生成随机数。第三行用sed从文件中读取指定的行。
对于第三行指令,其实不用sed也行,用head -n "$rand" | tail -n 1"也是能得到相同的结果。完整指令:
fname="lab6.c"; rand=$((RANDOM%$(cat "$fname" | wc -l))); cat $fname | head -n "$rand" | tail -n 1总之能看出,对于操作数据,Linux自带的工具也很强大了。
这东西用来清log和冗余备份确实好用。
清文件夹记得把-f换成-rf。
find [target file in path] -mtime +2 |xargs rm -f2020.12.18 11:05:00
下面的指令用来释放系统内存,只在Ubuntu上测试过。长期运行的服务器最好严密监督内存使用情况:
echo 3 >/proc/sys/vm/drop_caches啊对了注意指令里是vm不是mv。
常用用法:
ln –s 源文件 软连接文件这可以帮我们把一个文件链接到另一个地方,类似Windows的快捷方式。
我一般会用它把正在开发的项目链接到nginx的目录下,来实时预览效果。
有时候一些网络应用会启动失败,提示端口被占用。那么一般怎么解决呢?
我的系统是Ubuntu20.04,其他Linux应该也大同小异。
就两步。先找到进程:
netstat -anlp| grep 端口号然后结束进程:
kill -9 进程pid完事儿。
或者可以用awk和管道把命令缩短到一行:
netstat -anlp | grep 3000 | awk '{print $7}' | awk -F '/' '{print $1}' | xargs kill -9不太好看但是还挺方便。起码手不疼了(
用nc可以进行局域网聊天(不是
用 socat 还可以群聊: 局域网内所有 Linux
机器,输入下方命令加入群聊(指 UDP 广播)(狗头)(狗头)
socat - UDP-DATAGRAM:255.255.255.255:12345,broadcast,bind=0.0.0.0:12345#!/bin/bash
line=1000
times=10
conf=/opt/nginx/conf/blockip.conf
tail /data/logs/nginx/access.log -n $line | \
grep -E '("status":"404"|"status":"302")' | awk '{print $1}' | \
sort | uniq -c | \
awk '$1>$times{print "deny "$2 ";"}' >> $conf
deny=$(sort $conf | uniq -c | awk '{print "deny "$3}')
echo $deny | sed "s/; /;\n/g" > $conf
/usr/local/sbin/nginx -t || exit
/usr/bin/systemctl reload nginxlazygit ,Git 的终端界面
ranger ,终端文件管理器
lolcat ,对输出做渐变色处理
trash ,mv 的垃圾回收站版本
icdiff ,diff 的样式改进版本
lsd ,带文件类型图标的 ls
#!/bin/bash

url="http://v2ex.com"
want="好玩"
wget "$url" -O contents
if
    result=$(cat contents | ack -i "$want")
then
    echo "$result" | mail -s "Notification" [email protected]
else
    echo "nothing"
fi最近经常在用这个指令查看空间使用情况:
du -sh ./* 2>/dev/null | sort -u比如看下缓存占用情况啥的:
❯ sudo du -sh ./* 2>/dev/null | sort -u
0       ./motd-news
1.4M    ./apparmor
2.0M    ./man
20K     ./snapd
228K    ./fontconfig
3.8M    ./debconf
32K     ./ldconfig
4.0K    ./pollinate
4.0K    ./private
8.0K    ./PackageKit
8.0K    ./apache2
8.0K    ./app-info
971M ./apt这个脚本读取第一,二个命令行参数,然后发送通知。可以跟其他工具串一块,简单实现服务器监控报警功能:
#!/bin/bash
token=PUSH_PLUS_TOKEN
url=http://www.pushplus.plus/send
json="{\"token\": \"$token\", \"title\": \"$1\", \"content\": \"$2\"}"
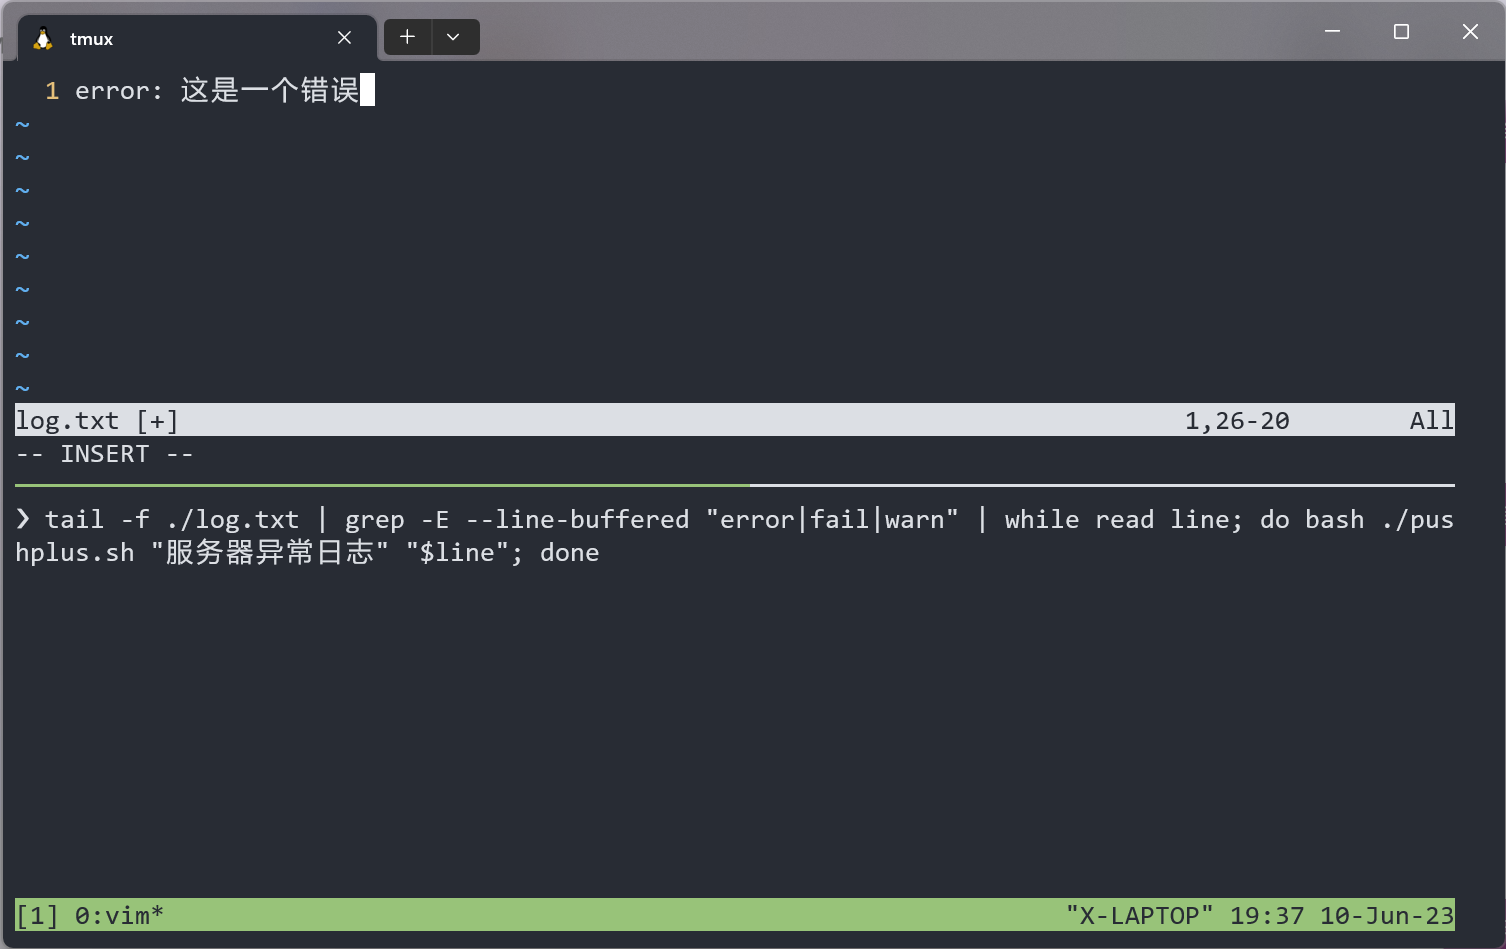
curl -H "Content-Type: application/json" -X POST -d "$json" $url单行脚本:
tail -F /var/log/syslog | grep -E --line-buffered "error|fail|warn" | while read line; do bash /path/to/pushplus.sh "服务器异常日志" "$line"; done效果如下:
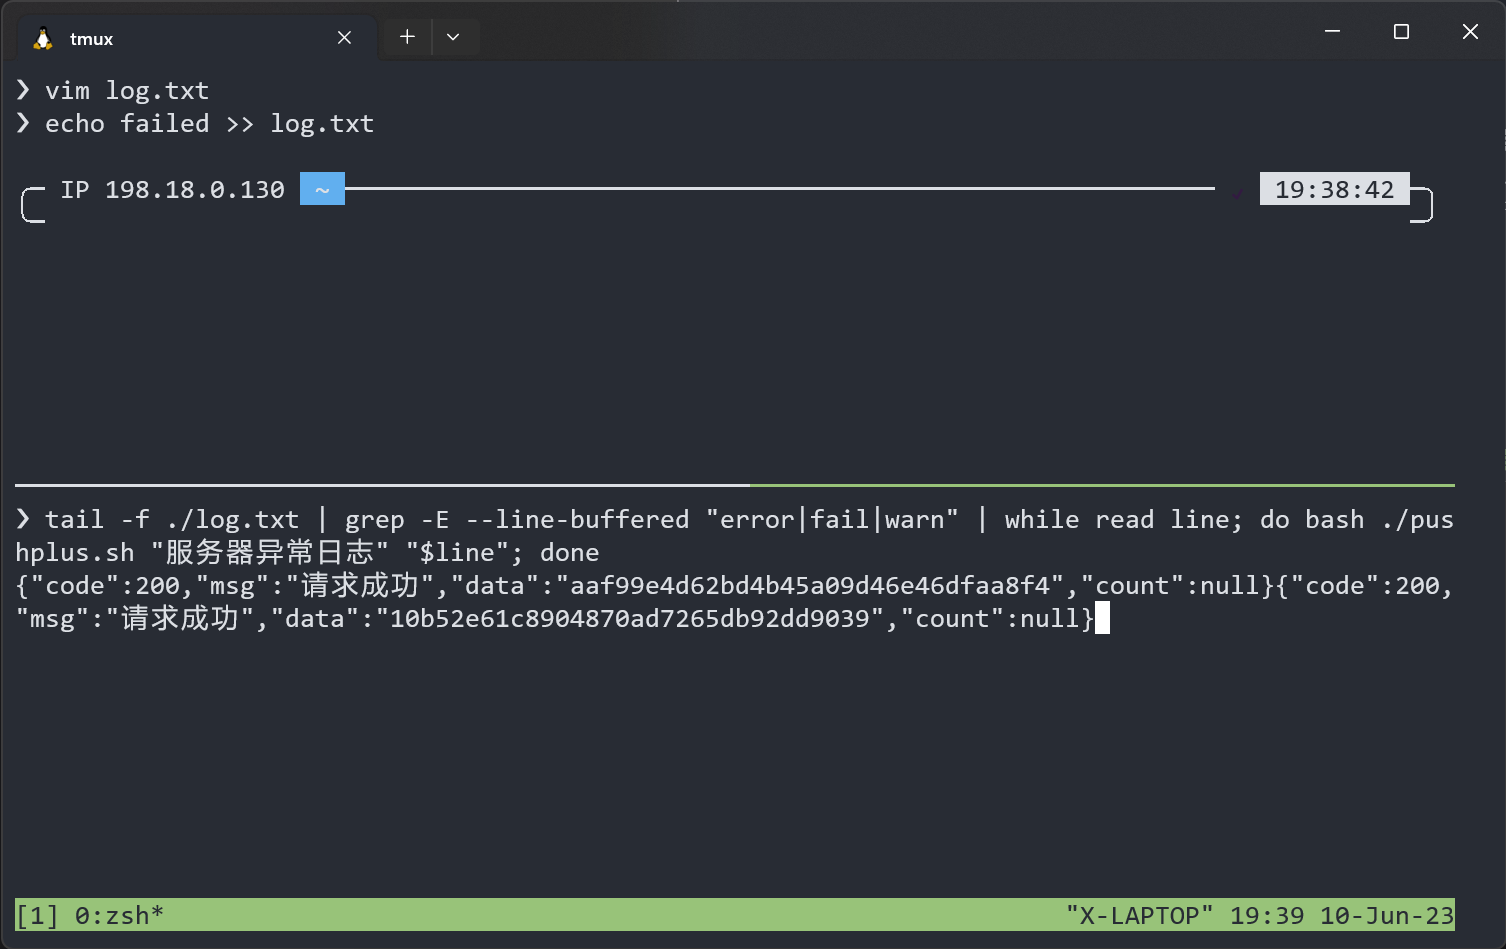

测试就完成了。然后直接nohup丢到后台,就能很方便地实现异常告警了。
用了一段时间之后,发现是挺舒服,配合crontab定时触发更是自动运维的好东西。
假设有一个运维工具将信息直接输出到stdout,那么我们可以在crontab里这么写:
output=$(/path/to/script.sh); pushplus "自动任务完成" "$output"不过得先将上面的pushplus.sh去掉后缀放在/usr/local/bin/之类的地方才能全局使用。
This is technically what cat (“concatenate”) is supposed
to do, even though most people just use it for outputting files to
stdout. If you give it multiple filenames it will output them all
sequentially, and then you can redirect that into a new file; in the
case of all files just
use ./* (or /path/to/directory/* if you’re not
in the directory already) and your shell will expand it to all the
filenames (excluding hidden ones by default).
$ cat ./* > merged-fileMake sure you don’t use
the csh or tcsh shells for that which expand
the glob after opening the merged-file for output,
and that merged-file doesn’t exist before hand, or you’ll
likely end up with an infinite loop that fills up the filesystem.
The list of files is sorted lexically. If using zsh, you
can change the order (to numeric, or by age, size…) with glob
qualifiers.
To include files in sub-directories, use:
find . ! -path ./merged-file -type f -exec cat {} + > merged-fileThough beware the list of files is not sorted and hidden files are
included. -type f here restricts to regular files
only as it’s unlikely you’ll want to include other types of files. With
GNU find, you can change it to -xtype f to
also include symlinks to regular files.
With the zsh shell,
cat ./**/*(-.) > merged-fileWould do the same ((-.) achieving the equivalent
of -xtype f) but give you a sorted list and exclude hidden
files (add the D qualifier to bring them
back). zargs can be used there to work around argument
list too long errors.
今天看系统日志的时候发现时间不太对,估计应该是没设置对时区。所以就记录一下。只需要一行:
 sudo timedatectl set-timezone Asia/Shanghai
 # 如果要查看所有可用时区的话
 timedatectl list-timezones
 # 查看当前时区信息
 timedatectl
或者也可以用创建符号链接的方式更改:
sudo rm -rf /etc/localtime && \
sudo ln -s /usr/share/zoneinfo/Asia/Shanghai /etc/localtime借助smartctl就能做到。这工具输出十分丰富,还能跑硬盘测试,这里演示下最简单的用法:
for DEVICE in "sda sdb sdc"; do
  smartctl -a $DEVICE | \
   grep 'SMART overall-health self-assessment test result'
done
加强版,输出报告:
#!/bin/bash
SMARTCTL="smartctl"
DEVICES="sdb sdc"

get_model() {
  DEVICE=$1
  $SMARTCTL -i $DEVICE | grep "Device Model" | awk '{print $3}'
}
check_disk() {
  DEVICE=$1
  MODEL=$(get_model $DEVICE)
  STATUS=$($SMARTCTL -a $DEVICE | grep 'SMART overall-health self-assessment test result')
  RESULT=$(echo $STATUS | awk '{print $NF}')
  if [ "$RESULT" != "PASSED" ]; then
    ALERTS="$ALERTS\n硬盘异常:$DEVICE ($MODEL)\n$STATUS\n" # 追加到变量中,用换行符分隔不同的硬盘信息
  else
    ALERTS="$ALERTS\n硬盘正常:$DEVICE ($MODEL)\n$STATUS\n" # 追加到变量中,用换行符分隔不同的硬盘信息
  fi
}

ALERTS=""
for DEV in $DEVICES; do
  check_disk /dev/$DEV
done

echo "$ALERTS"基本就是个用ls和awk组装起来的工具,没啥技术含量。使用时会把目录下的所有东西压缩为以文件为名的压缩包:
ls | awk '{print "zip -r \"" $0".zip\" \""$0"\""}' | bashJYY的奇妙课堂.jpg
Linux原生支持PPM图片(Portable Pixel Map)格式。它的结构很简单:
P6              // magic number
WIDTH HEIGHT
MAX COLOR       // number of single color, mostly be 255
...PIXELS       // pixels
每一个像素都是一个结构体,存储了图像的rgb信息:
// A struct to represent a RGB pixel
typedef struct {
    unsigned char r, g, b;
} Pixel;所以,理论上可以直接手写二进制写出一张图片,或者用C实现:
#include <stdio.h>
#include <stdlib.h>

// Define the image dimensions and the maximum color value
#define WIDTH 200
#define HEIGHT 100
#define MAX_COLOR 255

// A struct to represent a RGB pixel
typedef struct {
    unsigned char r, g, b;
} Pixel;

// A function to write a PPM image to a file
void write_ppm(const char *filename, Pixel *image) {
    // Open the file for writing in binary mode
    FILE *fp = fopen(filename, "wb");
    if (!fp) {
        fprintf(stderr, "Error: cannot open file %s\n", filename);
        exit(1);
    }

    // Write the PPM header
    fprintf(fp, "P6\n"); // Magic number for binary PPM
    fprintf(fp, "%d %d\n", WIDTH, HEIGHT); // Image width and height
    fprintf(fp, "%d\n", MAX_COLOR); // Maximum color value

    // Write the pixel data
    fwrite(image, sizeof(Pixel), WIDTH * HEIGHT, fp);

    // Close the file
    fclose(fp);
}

// A function to create a gradient image
void create_gradient(Pixel *image) {
    // Loop over each pixel
    for (int y = 0; y < HEIGHT; y++) {
        for (int x = 0; x < WIDTH; x++) {
            // Compute the pixel index
            int i = y * WIDTH + x;

            // Set the pixel color based on its position
            image[i].r = x * MAX_COLOR / WIDTH; // Red component
            image[i].g = y * MAX_COLOR / HEIGHT; // Green component
            image[i].b = (x + y) * MAX_COLOR / (WIDTH + HEIGHT); // Blue component
        }
    }
}

// The main function
int main() {
    // Allocate memory for the image
    Pixel *image = malloc(sizeof(Pixel) * WIDTH * HEIGHT);
    if (!image) {
        fprintf(stderr, "Error: cannot allocate memory for the image\n");
        exit(1);
    }

    // Create the gradient image
    create_gradient(image);

    // Write the image to a file
    write_ppm("gradient.ppm", image);

    // Free the memory
    free(image);

    return 0;
}完成之后,可以用ImageMagick的convert gradient.ppm gradient.jpg将图片转换成jpg格式的图片。
好东西,比
scp好用
# 同步多个文件/文件夹到远程服务器目录
rsync -av files-or-dirs user@remote-server:/path/to/destination/

# 如果远程服务器的ssh端口不是默认22
rsync -av -e "ssh -p PORT_NUMBER" files-or-dirs user@remote-server:/path/to/destination/其中的-a代表archive,-v代表verbose。它的优点在于能够断点续传,以及增量同步。这样的特性使得它在镜像站搭建上也有重要地位。
另外,还可以结合find来做批量文件处理。比如我要将递归地将当前目录下所有以DCIM命名的文件夹合并到当前目录下,那么只需要:
find . -type d -name "DCIM" \
       -exec rsync -av --ignore-existing {}/ ./DCIM/ \
-exec rmdir {}上面的指令先找到所有名为DCIM的目录,然后使用rsync将所有文件合并到当前目录的DCIM目录中,最后使用rmdir删除其他无用文件夹。
要通过网络将一台电脑(我们称之为电脑A)上的串行端口/dev/ttyUSB0映射到另一台电脑(我们称之为电脑B)上,可以使用socat工具来完成。以下是在两台电脑上各自需要的命令:
电脑A需要将其串行端口/dev/ttyUSB0转发到TCP网络连接上。假设电脑A的IP地址为192.168.1.10,并且我们选择使用TCP端口7777来进行转发,可以使用以下命令:
socat /dev/ttyUSB0,raw,echo=0 TCP-LISTEN:7777,reuseaddr这条命令做了以下几件事: -
/dev/ttyUSB0,raw,=0:选择/dev/ttyUSB0设备,raw表示原始输入输出模式,echo=0表示关闭回显。
-
-LISTEN:7777,reuseaddr:在TCP端口7777上监听进来的连接请求,reuseaddr允许在同一端口重启监听服务而不会因为端口被占而出错。
电脑B需要从网络连接接收数据,并将其映射到一个虚拟的串行端口。我们可以使用socat来创建一个伪终端(pty),并从电脑A的7777端口接收数据:
socat PTY,link=/dev/ttyVUSB0,raw,echo=0 TCP:192.168.1.10:7777这条命令的作用如下: -
PTY,link=/dev/ttyVUSB0,raw,echo=0:创建一个新的伪终端设备,链接(命名)为/dev/ttyVUSB0,并设置为原始模式,关闭回显。
-
TCP:192.168.1.10:7777:连接到电脑A的IP地址192.168.1.10上的TCP端口7777。
通过这样的设置,电脑B上的应用程序可以通过//ttyVUSB0与电脑A上的/dev/ttyUSB0设备进行通信,就像直接连接在一起一样。请确保网络连接稳定,并在需要的情况下调整IP地址和端口设置。
这是CLI对GUI的一次薄纱。
例如我想移除当前目录下所有文件的.前缀,我就可以使用这样的命令:
for file in .*; do [ -f "$file" ] && mv "$file" "${file#.}"; done还能扩展出更多的用法:
${file#.}可以移除文件名的前导字符${full_path#/path/to/}可以变换路径为相对路径${file%.*}会删除文件的后缀,比如文件名是document.pdf,${file%.*}就是document${parameter/pattern/replacement}:比如${file/.old./.new.}能把文件名的.old.换为.new.这一个指令的用法就值得讲半天。find是查找指定路径下匹配文件的有用工具,同时还能对已有的文件执行自定义的操作。最简单的用法就是查找文件:
find . -type f -name test*.md如果要匹配多个正则求并集可以这么做:
find . -type f -name *.a -o -name *.b -o -name *.c它会给出匹配的文件列表。然后使用其他工具处理就行,或者可以用-exec参数处理文件列表(后边再说
众所周知diff能用于数据比对,比对结果可以存储为patch来方便地描述源文件的更改,同时也能在传输时节省流量,不用把整个文件重新传过去等。
diff的一个参数是-q,可以用于递归比对两个目录:
diff -q "$folder1" "$folder2" | grep "Only in $folder2" | awk -F': ' '{print $2}' | xargs rm -rf下面的指令比对第一个目录和第二个目录的不同,并删去第一个目录中相比于第二个目录多出的部分。
coreutils里边不少工具都是玩字符串魔术,也就是字符串处理的。这不光对于编写各宗脚本很有用,甚至在处理数据上也相当有用。特别是面对一些格式很奇怪的数据,现场找不到parser的那种,你几乎可以正则+批量操作秒了,不能秒怎么办?别急,这不还有awk嘛。说到这玩意,这既是个程序,也是个编程语言。它像python那样,既能用命令化的方式编辑文件,也能编写awk脚本来作为文件批量编辑的工具。
刚好要给博客系统写个脚本来增加个最近文件功能。所以就写了个脚本来首先获取一个按照日期排序的文件列表。做法很简单,就是那几样老工具继续组合,不过参数倒是挺新的,因为ls我平时用的时候几乎就没加过参数()
find . -type f -name "*.md" -print0 |\
    xargs -0 stat -c "%w %n" |\
    sort -n |\
    cut -d' ' -f4 |\
head -n 20一个find用来找出匹配文件路径,一个stat转换为日期+时间的形式,剩下的就是排序和字符串操作了。另外如果想倒序输出的话(从最新到最旧输出文件列表),只需要给sort加个-r参数逆向排序就行了。
把这东西加到我博客里边之后基本是这效果:
xeonds@localhost# cd blog
Welcome back to blog, write something?
Recent 5 files:
./_posts/计算机科学/编程语言/Script/Bash学习笔记.md
./_posts/计算机科学/计算机视觉/计算机视觉学习笔记.md
./_posts/计算机科学/编程语言/JavaScript/记一次npm和nodejs安装过程.md
./_posts/计算机科学/开发工具/VScode使用笔记.md
./_posts/flutter-intro.md
xeonds@localhost#
其实现在Obsidian用的少了,反而是Vim用的更多了。一个是Vim性能和资源占用上确实能吊着前者打,另一个是Obsidian对于Vim的支持还是比较有限和割裂(比如
<Ctrl+C>和<Ctrl+V>的处理,比如中文输入法的支持,在我这边的感知是达不到原生Vim的体感的)。不过Vim这边怎么复制粘贴图片是个大问题,不过有必要不咕咕咕的话,也许写个脚本也能搞定。
Bash里边有个printf调用,好像是shell内建的POSIX标准命令。也是突然想起来能这么用的:
printf '%x\n' 2024或者,也可以用bc或者dc解决:
$ echo 'obase=16; 9999999999999999999999' | bc
21E19E0C9BAB23FFFFF
$ echo '16o 9999999999999999999999 p' | dc
21E19E0C9BAB23FFFFFPOSIX Utility Syntax Guidelines, §12.2.13 of The Open Group Base Specifications: For utilities that use operands to represent files to be opened for either reading or writing, the ‘-’ operand should be used only to mean standard input (or standard output when it is clear from context that an output file is being specified).
从效果来看,命令最后跟随的-类似一个占位符,代表这个命令要处理的一个文件。这个占位符表示,明确将stdin/stdout作为所占位置的文件。比如你可以给一些文件操作命令最后加上-来表示文件,它就会将原本要写入文件的内容输出到屏幕上/从命令行读取原本作为输入的文件(的内容)。
有了它,我们就能玩出来一些有意思的花样:
tar -cjf - /path/to/directory-or-file | ssh user@hostname dd of=/path/to/destination/name-of-archive.tar.bz2这个命令首先使用bzip2压缩文件,只不过将压缩后的文件借助-占位符输出到了stdout,然后借助管道符|将压缩好的文件数据传送到下一个命令。
对于下一个命令,首先要知道它是ssh的一种用法,就是在登陆后直接执行一条命令然后退出,所以这条命令就是先连接到目标设备上,然后执行dd of=/path/2/fname来将文件写入到指定的位置。其中的dd of=也是dd的缺省用法,当stdin有输入时,就可以省略if=这个参数。
linux设备全盘到当前设备在另一篇ESXi折腾小记里边我写过这种用法,一并记录到这里。
ssh username@server_ip "sudo dd if=/dev/sdX bs=4M status=progress" | dd of=/path/to/local/backup/server_root.img bs=4M调换一下本地和远程设备也没问题:
sudo dd if=/dev/sdX bs=4M | ssh username@server_ip "dd of=/path/2/server_disk.img bs=4M status=progress"或者想在传输过程中对数据流压缩一下,在中间插个管道就行:
ssh x-server-local "sudo -S dd if=/dev/sda2 bs=4M status=progress" | bzip2 -c | dd of=sever-backup.img bs=4M解压的时候管道反过来用就行:
dd if=server-backup.img bs=4M status=progress | bzip2 -c | ssh x-server-local "sudo -S dd of=/dev/sda2 bs=4M"^Z
bg xxx
disown xxx